
You are here: Home > Nerve Agents - Prehospital Management > Nerve Agents Antidotes
Nerve Agent Treatment - Autoinjector Instructions
- Mark 1 Kit
- Diazepam (CANA — Convulsant Antidote for Nerve Agent)
- See also: Nerve Agents - Prehospital Management
- See also: Nerve Agents - Emergency Department/Hospital Management
Mark 1 Kit
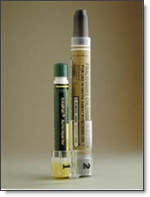
Atropine autoinjector and
pralidoxime chloride autoinjector
-
Mark 1 Kit contains:
-
Atropine autoinjector
- 2 mg in 0.7cc
-
Pralidoxime autoinjector (2-PAM)
- 600 mg in 2cc
-
Atropine autoinjector
-
Injection site selection:
It is important that the injectors be given in a large muscle area. (Figure 1)- The most common injection site of administration is the OUTER THIGH MUSCLE
- For thinly built individuals, the injection should be given in the UPPER OUTER QUADRANT OF THE BUTTOCKS

Figure 1. Locations for administration
Source: Procedures for administering the nerve agent antidotes (PDF - 138 KB) (U.S. Army)
-
Antidote administration:
Administer up to 3 Mark 1 Kits as needed- Remove MARK 1 Kit from its protective pouch
-
Grasp the atropine autoinjector (the smaller of the
two) and remove it from slot number 1 of the plastic clip.
The yellow safety cap will remain on the clip and the
atropine autoinjector will now be armed, and the needle
will eject from green tip (Figure 2)
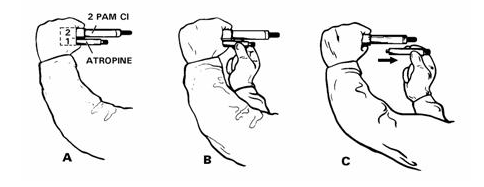
Figure 2. Removing atropine autoinjector from clip
Source: Procedures for administering the nerve agent antidotes (PDF - 138 KB) (U.S. Army)
- Grasp the unit and position the green tip into the victim's injection site (outer thigh or buttocks)
-
Apply firm, even pressure until the autoinjector pushes
the needle into the injection site and it begins firing.
Using jabbing motion may result in improper injection or
injury to the muscle (Figure 3).
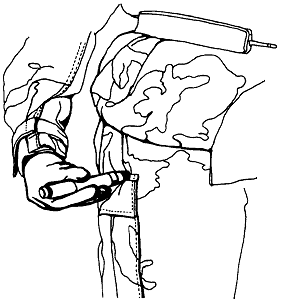
Figure 3. Self-aid thigh injection
Source: Procedures for administering the nerve agent antidotes (PDF - 138 KB) (U.S. Army)
- Hold the injector firmly in place for at least 10 seconds.
- Carefully remove autoinjector from injection site (use caution as needle will be exposed)
-
Remove the 2-PAM injector from slot number 2 of the
clip (Figure 4).
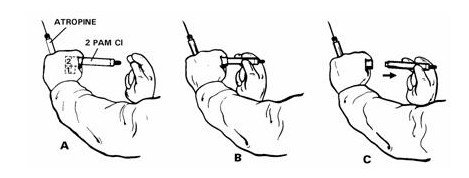
Figure 4. Removing 2-PAM Cl autoinjector from clip
Source: Procedures for administering the nerve agent antidotes (PDF - 138 KB) (U.S. Army)
- Inject the victim the SAME way as described for the atropine autoinjector (steps 3-6)
- Massage the injection sites, if time permits
Diazepam (CANA — Convulsant Antidote for Nerve Agent)
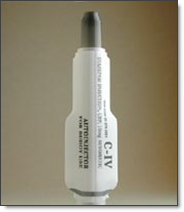
Diazepam autoinjector
- Use of Diazepam is for actively seizing patients; therefore, it is not intended for self-administration.
-
Diazepam should be administered with the three MARK I kits
when the casualty's condition warrants the use of three MARK
I kits at the same time
- Hold diazepam auto-injector (CANA) in front of you
- Remove the grey safety cap by pulling it out
- Do not touch the black end of the injector
- Grasp the unit and position the black tip into the victim's injection site (outer thigh or buttocks)
- Apply firm, even pressure until the autoinjector pushes the needle into the injection site and it begins firing. Using jabbing motion may result in improper injection or injury to the muscle.
- Hold the injector firmly in place for at least 10 seconds.
- Carefully remove autoinjector from injection site (use caution as needle will be exposed)
References
- FDA approved labels/package inserts of nerve agent antidotes (DailyMed, NLM)
- Multi-service Tactics, Techniques, and Procedures for Treatment of Chemical Warfare Agent Casualties and Conventional Military Chemical Injuries (PDF - 3.04 MB) (US Army, Appendix E, August 2016)